

Authelia is an open-source authentication and authorisation solution, fulfilling an identity and access management (IAM) role, providing multi-factor authentication (MFA) and single sign-on (SSO) for applications via a web portal.
OpenID Connect (OIDC) is an authentication protocol based on the OAuth 2.0 framework for authorisation, specifically IETF RFC 6749 and RFC 6750.
Motivation#
The OpenID Connect protocol is a complex beast, but you don’t need to understand every detail to reap the benefits. When properly configured, OIDC offers a centralised and standardised authentication service which can be easily integrated with multiple applications.
For applications that don’t support OIDC, there’s the option of using middleware like OAuth2 Proxy or Traefik Forward Auth, but that’s an article for a later time.
There are many applications that provide OIDC support. Among these are Keycloak, Zitadel, Authentik, and Kanidm on the open-source side.
My reason for picking Authelia is for its focus on declarative configuration, as well as a small memory footprint at around 25 MiB — excluding memory used by an (optional) database.
Authelia’s architecture was originally intended as a companion for reverse proxies like Traefik or Envoy. Since v4.29 — released in 2021, Authelia has started gradually implementing the OIDC spec as a beta feature. Currently at beta stage 7 out of 8 in v4.39, I consider it a fairly stable feature, at least for homelab use.
For more details on how Authelia implements OIDC, I can recommend an article on OpenID Connect 1.0 Nuances by James Elliott, one of the maintainers of Authelia.
Overview#
We will first do a pretty straightforward and simple deployment of Authelia, using only ephemeral storage and no extra integrations.
We’ll then go straight to OIDC configuration, skipping how to configure Authelia as a reverse proxy, which should be amply covered in their Proxies documentation.
After having a working prototype, we will explore how to integrate Authelia with a Postgres database. Next, we will look at SMTP integration for e.g. setting up TOTP, before we investigate how to sync users from an LDAP-server.
If you’re not one for details, digressions, and diatribe, you can find the finished manifests in the Summary section.
Prerequisites#
This article assumes a working Kubernetes cluster. If you’re just getting started, I can recommend either minikube or k3d. For a more production like cluster you can check out my article on Bootstrapping k3s with Cilium, or — if you’re really deranged, Talos Kubernetes on Proxmox using OpenTofu.

The cluster should also have either a working Ingress or Gateway API implementation. I’ve previously written how to create certificates using cert-manager with Ingress with Traefik, and Gateway API with Cilium as inspiration.

To provision some of the required secrets for configuring OIDC with Authelia, we will be using OpenSSL, but I’ll also show how they can be automatically created using cert-manager.
Basic Configuration#
We can make use of Authelia’s official Helm chart to get quickly started. Although they consider the chart to be in beta, I’ve found it to be fairly stable.
We can add the Authelia chart to our local repository by running
helm repo add authelia https://charts.authelia.com
helm repo update
and follow up with
helm show values authelia/autheliato display available configuration parameters. These values can also be found in the chart’s GitHub repository if you prefer.
A minimal configuration to spin up Authelia includes a single cookie domain of 127.0.0.1 (localhost doesn’t work),
as denoted on line 4 below.
We can also opt to use local state storage (line 6),
meaning no high availability,
or persistent state.
| |
We’ve also configured the notifier on line 8 — for e.g. setup of TOTP or password reset, to write to a file. A better alternative is SMTP/e-mail integration, which will take a better look at in the SMTP integration section.
Lastly, we need to configure an authentication backend for where to source users from.
Simply enabling it as we do on line 10 will use a file inside the pod which we can later configure using a
ConfigMap.
By default, this file contains a single user with username and password both set to authelia.
In the LDAP authentication backend we will explore how to connect to an
LDAP backend.
Before installing the chart we create
a Namespace caleld authelia.
We then change the kubectl context to use it by default
— so we don’t have to append --namespace authelia (or -n authelia) to every kubectl and helm command,
though I’ll add them to every command nonetheless in case you skip this detail.
kubectl create namespace authelia
kubectl config set-context --current --namespace authelia
With the Namespace created and context switched, we can run
helm install authelia authelia/authelia --namespace authelia --values basic/minimal-values.yamlto install Authelia in our cluster. This should create a DaemonSet spinning up a Pod of Authelia on each worker node in the cluster.
If you have more than one worker node, this will cause a headache as spinning up multiple Pods which all store their own separate state means authentication will be a hit or miss depending on which Pod we hit.
When testing Authelia, it might be a good idea to switch to using a Deployment instead of the default DaemonSet. Adding
pod:
  kind: Deployment
to the chart values will change the workload type to a Deployment.
To verify that everything is working, we can port-forward the service by invoking
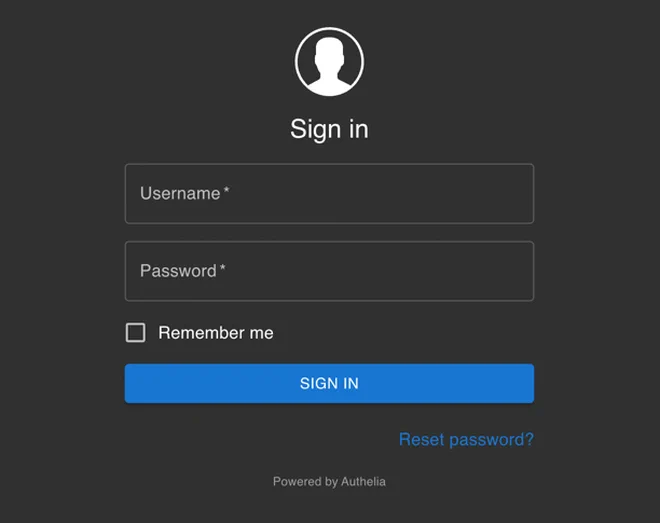
kubectl -n authelia port-forward svc/authelia 9091:80Navigating to http://127.0.0.1:9091, you should now be greeted by a login screen where you can log in using authelia/authelia.

If for some reason you’re unable to see the login screen, you can try to check the logs by running
kubectl -n authelia logs -l app.kubernetes.io/name=authelia -fCryptographic secrets#
The Authelia chart creates a Secret on the first run, containing random keys for encrypting storage, session, and password reset functionality. When we enable OIDC, a fourth HMAC key is also created, which is used for hashing the opaque Access Tokens for easy validation.
To make sure that we use the same cryptographic keys every time, we can either copy the generated Secret, or create the keys manually using the Authelia binary by running
docker run docker.io/authelia/authelia authelia crypto rand --length 128 --charset alphanumericHaving generated four distinct random values, we can craft the following Secret
| |
We then add
| |
to the chart values.yaml to use our manually generated values instead of the auto-generated ones.
Remember to add the Secret to your cluster by running
kubectl apply -f simple/crypto.yamlAs a sidenote, Secrets should obviously be kept secret. To help with this, tools like Sealed Secrets, which allow you to check in encrypted secrets in your repository, are invaluable.
Provisioning users#
The default file authentication backend picks up users from a /config/users_database.yml file
with hashed passwords.
To override the default filename, we can change the authentication_backend configuration to.
| |
Next — continuing to use a file to provide users, we can create a new user “database” using either a Secret or ConfigMap containing the users. Since the passwords are hashed, it should be safe to store them publicly available, though the file also gives away usernames and email addresses, so I’d recommend using a secret to keep everything hidden.
To create hashed passwords using e.g. the Argon2 algorithm, we can again leverage the authelia docker image by running
docker run --rm -it docker.io/authelia/authelia authelia crypto hash generate argon2Note that it’s also possible to omit the password in the configuration file, but you have to dig through the container filesystem to find the password reset email — similar to 2FA as described below, unless you’ve configured SMTP-integration.
A sample user configuration as a Secret looks like
| |
Notice the groups on line 14 and 19 which we can later use as an OIDC groups claim for access control.
Consult the Authelia documentation for a more
comprehensive file-example,
or the attributes-section for all the details including extra
and custom attributes.
To add the file containing the user “database” into the Authelia Pod, we can modify the chart values with
| |
to mount the Secret as a volume.
Running the following commands should add the Secret containing the user configuration and update Authelia to use it
kubectl apply -f simple/users.yaml
helm upgrade authelia authelia/authelia --namespace authelia --values simple/values.yaml
Configuring 2FA#
Having created a user, we should now add some kind of 2FA to better protect it.
Resuming the port-forwarding of the Authelia Service
kubectl -n authelia port-forward svc/authelia 9091:80and navigating to http://127.0.0.1:9091 again to log in, we can add 2FA by clicking Register device after logging in.
Trying to add a one-time password (OTP) should show the below dialogue-box which you must keep open until you find the identity verification one-time code.
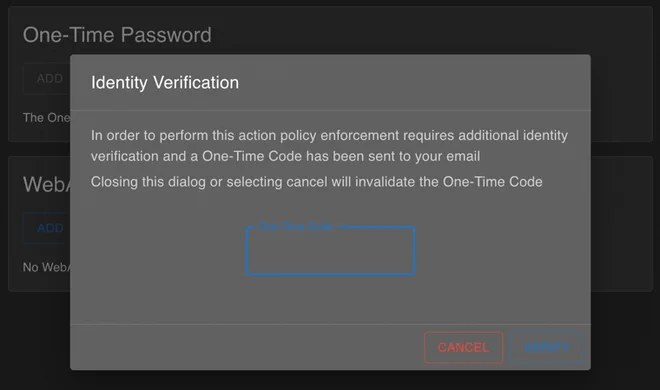

If we had configured the SMTP-notifier already, this code would’ve been sent to the user e-mail. Since we’ve only configured a filesystem notifier up till this point, we have to find the identity verification code inside the Authelia container.
Knowing that the notification is stored in /config/notification.txt inside the Authelia container,
we can run
CONTAINER=$(kubectl -n authelia get pod -l app.kubernetes.io/name=authelia -o name)
kubectl -n authelia exec $CONTAINER -- cat /config/notification.txt
to find the identity verification code.
Inputting the code should lead you through a familiar process of registering an OTP using either a QR code or a secret you can manually input in your favourite OTP tool.
OIDC configuration#
Before we can add OIDC clients, we first need to configure basic OIDC settings.
For the complete Authelia Helm chart values file, check out the Simple summary section.
A JSON Web Token (JWT) is a compact, self-contained token used for securely transmitting information between parties as a JSON object. JWTs serve as a standardised way to represent claims securely between two parties.
In the context of OIDC and OAuth 2.0, JWTs take the role of transferring identity claims between an identity provider (IdP) and a client.
To sign JWTs, we need a private key called a JSON Web Key (JWK). We can define multiple JWKs with different algorithms for better security, but at least one of them must be an RSA private key configured with the RS256 algorithm.
We can manually generate the required RSA key by using either the Authelia binary
docker run -u "$(id -u):$(id -g)" -v "$(pwd)":/keys authelia/authelia:latest authelia crypto pair rsa generate --directory /keysor OpenSSL
openssl genrsa -out private.pem 2048To create a Secret with the generated file, we can either run
kubectl create secret generic jwk-rsa --from-file private.pem -n authelia --dry-run=client -oyaml > simple/jwk-rsa.yamlor paste the value into a Secret’s stringData field
# simple/jwk-rsa.yaml
apiVersion: v1
kind: Secret
metadata:
  name: jwk-rsa
  namespace: authelia
stringData:
  private.pem: |
    -----BEGIN PRIVATE KEY-----
    MIIEvwIBADANBgkqhkiG9w0BAQEFAASCBKkwggSlAgEAAoIBAQDmQR5KGGOqscBK
    ZmgBfGMqFl3UJ+JzeA8yvlkYYC/gOuIiDkHIE8MjzHd21Df7zRRGEr+Mw7WZ73Cu
    JBofb3D+pOKEYE9oM35KyGfC9wZfHmz/ToY6geNRgPpdAvblwLAq4yKHLfJoc2Ji
    S3dtkSL9Ub8zx8eBi+GIEI2MdK35ZDB2nfszVaIX5Xn+IFa7mUK3tbr9CfryrCyM
    OlKLwoGPrGtXc9jKSVbHItAQ4Bip4yqvEF0bq1rK6OC0DfGaKqKHZntjLUtEJ934
    yRasa++8dGxnV4Ewv0wLnR8kN+rDUPk65gY2Ottn8WC9RA8pRSVm/BMNBmLsdm1v
    hmpLaFBpAgMBAAECggEBANoeh9YDIq85sYIJXq9BqSLei0YF/nQKIMOeJAJ+Y/wT
    a9J9FP23Et2fvO+5e8sx6+mxqvlrEGZht6mPk5uB01W21so1/iMk3Jd1Hy5HGicT
    SIfWWDumfbPg7cscmszs6zXFcxkBgqhF3cZl3R3TJoU4Yltn/muPGjfuDlkm0wPy
    hBNG5erNSUDuz6wwfupJ9Ln/cxDPRpMITemkrKRK83C/deyHnoKCCwPe0Bh5kYK4
    j/dcrSFdHokrxf/Jo46v67Nb6TsuZ9ZLmo1Gc7OfYeBTw4W8rDgeY2rwUK26fTE5
    6nQZqEGpHNQqGx9NtD3FDVCFug14qpZIuzwJDRiu4H0CgYEA9xZwzWcANFNWe+d9
    ZB/3CVPw29rWwF28sw8FfaU/I8eg6kST1VaI5IFxsq7tQKF33dUwT2pu1E5uiqSn
    f+wzXyEYaU9XGmZ2Nu5V9ZEeXBUlO6Dvposaa5Pa2spWjdztWA1uyhlo4mkE+RVA
    RZBXAF7rQ9nvkT0FK8RwrIlJFRcCgYEA7o8+CxNIMjo+SvvSFDlEkRjV+cZIEDg8
    Otc9p5/ZpuR9ROUuIAC5XkcWGHl1SHJmvrjgT601+kTmYCgE30Gks2KDT5uv8frD
    TUB4yn8APxolga4t4szSumLFcqMol79uBrs8W5tNpJti4nT5hIfdrulAH9JYLj3r
    uhA94yBsNn8CgYEA6FqM90s98PbRpDDbRJWenIH4RPc07a74bTXaBv6nMoFevA6D
    KqJ2ltN3VP2UlCuDafM5u+Stli6vWuddsDkxUerwZs+6bFQgJKXZ5dRyxUsJOVqt
    ImM7FCD1NLwDyuIPu7beEWT1sbvqdkVarFAA0JNyD9tYoq7MNw1Cm616MT8CgYEA
    ywdd5k8iwpyPJ4Hp6QxULqjUcx8tdaBmoi1Na7u/oSoU8u2Zs+Lp4DLfuzSjfGTg
    zLDLNwRTTAwXhP6KJvfXFFRjLP1zYJ3qWXTlWHF95DZ8dUGoC74GGlq1cDsr8Poa
    yd/QHqauDcmw/spPEVwQbyxURsDeC3znghMQmJyffEECgYA+uwn8w7hL77O9R+pL
    DbC6com6faFE2a1rk8Bj/SlWK6fjrjyFhnEmH7b00t9PAwN7GaQhOI28T8OsrXuH
    SSwuAbhGPiSUgURmCz3jkyJ5sP7RYhSSqCxi/UsczrNlpUmDnlSgLgVQMS+idnis
    fK9k70Cc6TdDIV0daBi5Cgf6tA==
    -----END PRIVATE KEY-----
Add the Secret containing your own private RSA-key by running
kubectl apply -f simple/jwk-rsa.yamlWhether you always keep a tinfoil hat by your side or simply prefer extra security, you can also generate an ECDSA key using the P256 curve by running
docker run -u "$(id -u):$(id -g)" -v "$(pwd)":/keys authelia/authelia:latest authelia crypto pair ecdsa generate --curve P256 --directory /keysInstead of manually creating the keys, you can also let cert-manager do the heavy lifting by creating Certificate resources and use the secrets generated by those. We explain how to do this in the Trusted JWKs section.
A reference to the Secret containing the JWK must be added to values.yaml file for Authelia to be able to pick it
up.
| |
We then tell Authelia to use this Secret by adding
| |
in the same values.yaml file.
Depending on the client implementation, it might also be necessary to
allow cross-origin requests (CORS) for some endpoints.
The Authelia documentation
recommends to at least enable userinfo, but below we open for a few more.
| |
By setting allowed_origins_from_client_redirect_uris to true we automatically enable CORS only for the list of
redirect_uris from defined OIDC clients.
Another option is to manually list each allowed origin under the allowed_origins key.
Authelia v4.39 introduced changes to
the ID Token to mirror
the standard claims from the specification.
A potentially breaking
— though correct, change is not including groups in the ID Token by default.
Not including the groups claim in the ID Token will break clients relying on the claim be present in the ID Token
and not using the Access Token to grab the claim from
the userinfo endpoint.
email or preferred_username claim in the ID Token open themselves up to a security
vulnerability as these claims are considered mutable.
Only the sub (subject) and iss (issuer) should be considered stable per
the OIDC 1.0 spec.
The only guaranteed unique identifier for a given End-User is the combination of the iss and sub claims.
See James Elliott’s OpenID Connect 1.0 Nuances
article for further information.Authelia has helpfully created
a guide
on how to remedy the changes and allow groups to be included in the ID Token again which boils down to the following
addition in the oidc configuration
| |
We can then configure clients that rely on the groups claim to be present in the ID Token to use the legacy
claims policy to not break functionality.
Since Authelia requires us to define at least one OIDC client, we have to wait until we can apply the above changes.
OIDC client configuration#
There are a lot of options when it comes to OIDC clients, and the settings mainly depend on the client needs. Authelia lists some examples — e.g. Home Assistant, Immich and Argo CD,
OIDC clients are mainly split into two different categories, confidential clients, — for clients that can keep a secret, and public clients — originally intended for clients implemented in a browser using a scripting language. The former most often uses the Authorization Code Flow for authentication, and the latter Implicit Flow for authentication. There is also a Hybrid Flow for specific needs.
Note that Authelia considers the implicit flow to be deprecated due to security implications, and it should normally not be used. However, for its much simpler execution, we will use Implicit Flow for demonstrative purposes.
Configuration for a confidential client can be found in the Simple summary section, with complementary Bash-scripts to execute the Authorization Code Flow for the client in the Scripts section.
We can generate a Public Test Client under the configMap.identity_providers.oidc.clients key as follows
| |
A public client (line 41) also requires that the revocation, introspection, and pushed authorization endpoints
auth methods are set to none (line 50–52).
To include the groups claim in the ID Token we set the claims_policy to the legacy one we defined
earlier (line 46) and allow the groups scope.
Setting the grant_type to implicit (line 48) and response_type to id_token (line 49) we only allow
Implicit flow authentication where we get an ID Token in the reply to our dummy redirect_uri (line 45).
With a client configured, we can now run
helm upgrade authelia authelia/authelia --namespace authelia --values simple/values.yamlto upgrade the helm deployment with our OIDC configuration,
assuming you’ve already added the users, rsa-jwk and crypto Secrets previously mentioned.
Testing the OIDC client#
With Authelia configured, we can check that everything works as expected by trying to fetch an ID token using the Implicit Flow.
Start by port-forwarding Authelia by running
kubectl -n authelia port-forward svc/authelia 9091:80If everything works, you should now be able to find Authelia’s OpenID configuration at http://127.0.0.1:9091/.well-known/openid-configuration.
To initiate an Implicit Flow authorisation, you can execute the following script
#!/bin/bash
# scripts/implicit_flow.sh

# Configuration
client_id="public_client"
base_url="http://127.0.0.1:9091"
redirect_uri="http://localhost:8080/callback"
scopes="openid profile groups"
claims='{"id_token":{"email":{"essential":true},"name":{},"preferred_username":{},"groups":{}}}'

# URL encode scopes
url_encoded_scopes=$(jq -nr --arg str "$scopes" '$str|@uri')

# URL encode claims
url_encoded_claims=$(jq -nr --arg str "$claims" '$str|@uri')

# Fetch OpenID endpoints
openid_config=$(curl -s "$base_url/.well-known/openid-configuration")
auth_endpoint=$(echo "$openid_config" | jq -r '.authorization_endpoint')

# Create the authorization URL
auth_url="${auth_endpoint}"
auth_url+="?response_type=id_token"
auth_url+="&client_id=${client_id}"
auth_url+="&redirect_uri=${redirect_uri}"
auth_url+="&scope=${url_encoded_scopes}"
auth_url+="&claims=${url_encoded_claims}"
auth_url+="&state=$(openssl rand -hex 16)"
auth_url+="&nonce=$(openssl rand -hex 16)"

echo "Open the following URL in your browser and authenticate:"
echo -e "\033[1m$auth_url\033[0m\n"

echo -e "Paste full response URL (will show 'unable to connect' page):"
read -r auth_response

# Extract ID token from response
id_token=${auth_response#*id_token=}
id_token=${id_token%%&*}

echo -e "\nID token (paste into https://jwt.io for more details):"
echo -e "\033[1m$id_token\033[0m"
by running
bash <(curl -sSfL https://blog.stonegarden.dev/articles/2025/06/authelia-oidc/resources/scripts/implicit_flow.sh)Though you should definitely never send random scripts to bash, this script builds a URL with the required parameters, allowing you to either click the link or paste it into your browser.
Assuming you’re using the example users-config, you can log in using username “alice” and password “password”1
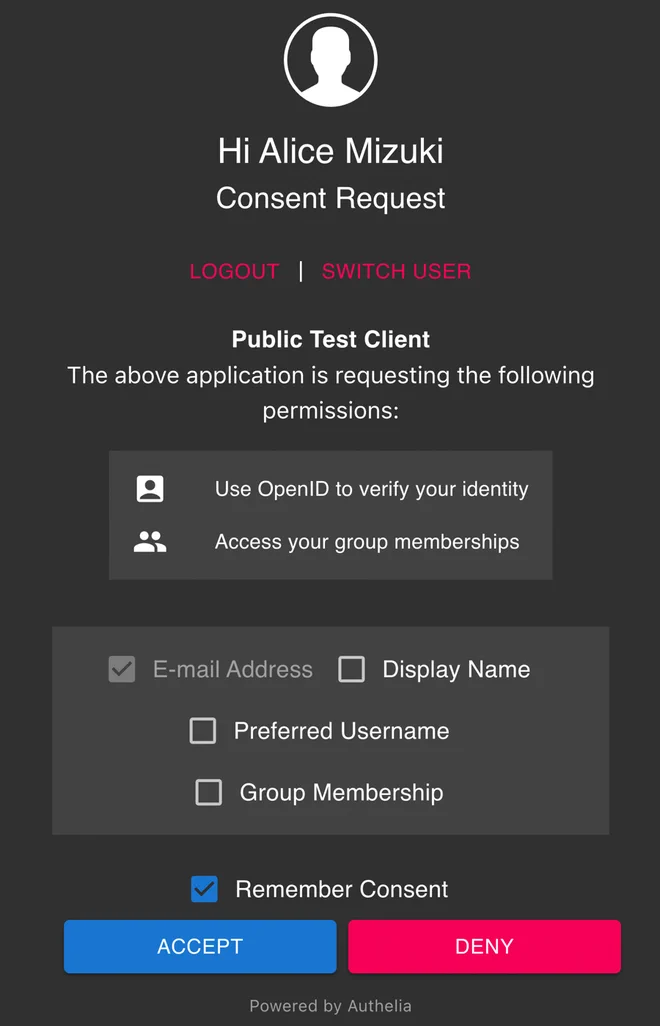
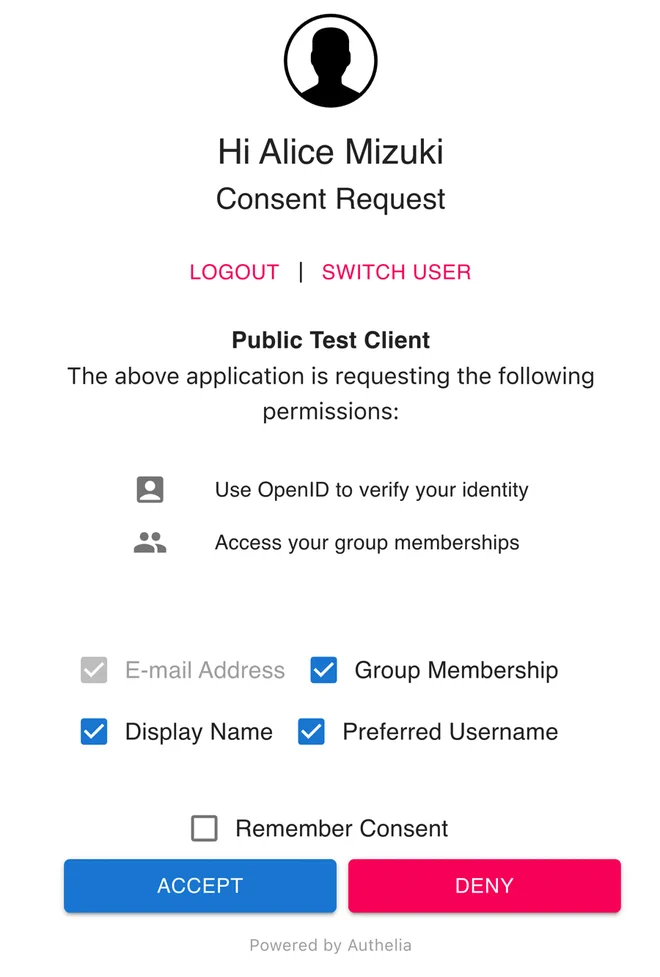
After logging in and accepting the requested consent, you’ll be redirected to a non-functioning localhost:8080 address. This is by design as we’re only interested in the URL.
Copy the full response URL and paste it into the script prompt to automatically extract the id_token parameter
containing your base64url encoded JWT which you can paste
into JWT.io to decode.
If you want to be diligent, you can also verify the signature by finding the JWK-encoded public key from the jwks_uri
endpoint given by the OpenID configuration, e.g. http://127.0.0.1:9091/jwks.json
which should show something similar to
{
  "use": "sig",
  "kty": "RSA",
  "kid": "default",
  "alg": "RS256",
  "n": "5kEeShhjqrHASmZoAXxjKhZd1Cfic3gPMr5ZGGAv4DriIg5ByBPDI8x3dtQ3-80URhK_jMO1me9wriQaH29w_qTihGBPaDN-SshnwvcGXx5s_06GOoHjUYD6XQL25cCwKuMihy3yaHNiYkt3bZEi_VG_M8fHgYvhiBCNjHSt-WQwdp37M1WiF-V5_iBWu5lCt7W6_Qn68qwsjDpSi8KBj6xrV3PYyklWxyLQEOAYqeMqrxBdG6tayujgtA3xmiqih2Z7Yy1LRCfd-MkWrGvvvHRsZ1eBML9MC50fJDfqw1D5OuYGNjrbZ_FgvUQPKUUlZvwTDQZi7HZtb4ZqS2hQaQ",
  "e": "AQAB"
}
To more thoroughly test your Authelia instance using the Authorization Code Flow with Proof Key for Code Exchange (PKCE), you can try the other scripts listed in the Scripts summary section.
Database storage#
Up until now we’ve used the built-in SQLite for storing state, though we’ve neglected to persist the state to a Persistent Volume, meaning a restart of the pod means a wipe of the database.
I’d argue that SQLite is more than enough in a non-high-availability homelab setup, but PostgreSQL is subjectively cooler, and also the recommended database.
First, we create a Secret containing the database credentials to be used by both Authelia and Postgres
# advanced/db-creds.yaml
apiVersion: v1
kind: Secret
metadata:
  name: db-creds
  namespace: authelia
stringData:
  postgres-password: '<POSTGRES_USER_PASSWORD>'
  username: 'authelia'
  password: '<AUTHELIA_USER_PASSWORD>'
  database: 'authelia'
Next, we change to the storage part in the Authelia values.yaml file to enable (and deploy) a Postgres database
backend using the Bitnami postgresql Helm chart
embedded as a dependency in the Authelia chart.
| |
To be able to reference the database credentials secret we also have to add it as an additional secret under the
secret key
| |
and configure Postgres to respect the credentials by referencing the same Secret
| |
Here we’ve also added persistence by telling the embedded Bitnami Postgres chart to create a Persistent Volume. How to actually provision the Persistent Volume depends on your Kubernetes configuration. The above configuration works if you have a functioning default Storage Class implemented, like in minikube.
If you’re interested in more details about running databases in Kubernetes, I’ve written an article about Postgres databases in Kubernetes. Here I also introduce the more feature-rich CloudNativePG operator for running Postgres in Kubernetes. Another loved alternative is the Zalando Postgres Operator.

Session persistence#
By default, Authelia stores sessions in-memory. This won’t reliably work in a high-availability setup since we’re not guaranteed to always hit the same pod.
To enable distributed session storage, Authelia has support for Redis and — by extension, Valkey.
We can add Valkey using its official Helm chart with
minimal configuration.
Here we explicitly disable dataStorage (line 29) and tls (line 30),
which is also the default values for the Valkey chart.
Disabling dataStorage means that Authelia will lose all sessions if Valkey restarts,
promting users to log in again.
Since Valkey is deployed in the same cluster as Authelia,
not using TLS should also not pose too much of a security risk.
| |
For some extra security, though, we enable authentication (line 32).
When enabling authentication, it’s important to also define a default user,
since without one anyone can access the Valkey database.
We could of course use this default user for Authelia,
but for the sake of clarity I prefer a named user.
We therefore disable all permissions for the default user (line 36),
and create an authelia user with all permissions (line 39).
Our Valkey users also need passwords, create a Secret containing the chosen passwords
| |
and reference them in the values (line 37 and 40).
Next, we need to configure Authelia to use our Valkey instance.
This is done under the configMap.session.redis key
— reminding us that Valkey is a fork of Redis.
| |
Here we’ve elected to use the FQDN of the Valkey Service as the host (line 31),
but using only valkey is just as valid as long as Valkey runs in the same namespace as Authelia.
Configure the Valkey credentials for Authelia (line 33–34),
and remember to register the Secret under the secret key.
| |
SMTP notifier#
Instead of having to dig through the container filesystem when setting up 2FA or resetting passwords, we can instead set up Simple Mail Transfer Protocol (SMTP) integration to have Authelia send us the information instead.
I’ve previously described how to get started with SMTP in my LLDAP article, so I’ll allow myself to be brief by suggesting you read the SMTP-integration section there to get started.
Assuming you picked MailerSend (affiliate link) and configured it as in the linked article, you can create a Secret containing the SMTP user credentials
# advanced/smtp-creds.yaml
apiVersion: v1
kind: Secret
metadata:
name: smtp-creds
namespace: authelia
stringData:
username: "<SMTP_RELAY_USERNAME>"
password: "<SMTP_RELAY_PASSWORD>"and add the following configuration to Authelia for the password
| |
Normally, we would add the SMTP username in clear text under the configMap.notifier.smtp.username key,
but since MailerSend treats the username as a secret
— meaning they’ll send you “leaked credentials” emails if they find it in clear text on e.g. GitHub,
we have to be creative.
The Authelia Helm chart doesn’t have the same secret support for the SMTP username,
but we can add it as an environment variable under the pod key instead
| |
Note that we could’ve used this approach for the SMTP password as well, but I find using the built-in support in the Helm chart more elegant.
Remember to add the Secret as an additionalSecret.
| |
Authelia performs a check during startup to see if SMTP integration is working correctly. Check the logs if Authelia doesn’t start up.
LDAP authentication backend#
Storing users in a YAML-file as we’ve demonstrated earlier is perfectly fine for small homelab setups, but it again hampers the possibility of high availability.
LDAP — or Lightweight Directory Access Protocol,
is an ancient mature way of providing a central place for authentication.
LDAP being a beast in itself, I’ve covered some details in
my LLDAP article.

Authelia provides us with ample documentation in their LDAP implementation guide if you already have an LDAP server running for instance, Active Directory (Entra ID), FreeIPA, GLAuth or my personal favourite LLDAP.
Whichever LDAP backend you pick, the basic configuration should be fairly similar.
Authelia needs a user in your given backend which can request
— and possibly edit, user details.
For LLDAP this is lldap_strict_readonly for only read access, or lldap_password_manager of you also want Authelia to
be able to reset passwords.
Create a Secret containing the Authelia user password
# advanced/lldap-creds.yaml
apiVersion: v1
kind: Secret
metadata:
name: lldap-auth
namespace: authelia
stringData:
password: "<AUTHELIA_LLDAP_USER_PASSWORD>"and configure Authelia to pick it up in the usual way under additionalSecrets
| |
Next, enable ldap as an authentication backend and configure lldap as the default implementation unless you
plan to get fancy.
| |
Trusted JWKs with cert-manager#
For an extra layer of security it’s possible to include an optional certificate chain
— a so-called x5c parameter,
similar to how TLS is performed.
By using cert-manager, we can easily automate this process. I’ve previously written about how to get started with cert-manager in my Wildcard Certificates with Traefik article.
Assuming you have a working instance of cert-manger and configured a functioning Cluster Issuer, you can create an RSA private key with a valid certificate using the following Certificate resource
| |
or just as easily an ECDSA key
| |
Make sure to update the DNS name on line 8 to your Authelia instance hostname and take not of the secret name on line 17.
Next, add the Secrets created by the Certificates as additionalSecrets in the values.yaml file
| |
and reference them in the jwks configuration in the same values.yaml file
| |
OIDC Clients#
Now that you’ve (hopefully) got a working OIDC provider up and running, it’s time to make use of it. I’ve gone into some details on how in my Custom OIDC claims with Argo CD and Audiobookshelf article.
Summary#
All resources shown in this article can be found in the resources folder of the article. Where applicable, they are written for use with Argo CD with Kustomize + Helm, but should be easily adaptable for other approaches using e.g. Flux CD.
To render the full kustomization.yaml files you can run
kubectl kustomize --enable-helm ./ or
kubectl kustomize --enable-helm ./ | kubectl apply -f -to apply them directly.
Note that we have deliberately left out the creation of either an HTTPRoute or an Ingress, leaving it as a trivial exercise to the reader.
🗃️
├── 📂 basic
│ ├── 📋 kustomization.yaml
│ └── 📝 minimal-values.yaml
├── 📂 simple
│ ├── 📋 kustomization.yaml
│ ├── 📄 crypto.yaml
│ ├── 📄 ns.yaml
│ ├── 📄 rsa-jwk.yaml
│ ├── 📄 users.yaml
│ └── 📝 values.yaml
├── 📂 advanced
│ ├── 📋 kustomization.yaml
│ ├── 📄 cert-jwk-ecdsa.yaml
│ ├── 📄 cert-jwk-rsa.yaml
│ ├── 📄 crypto.yaml
│ ├── 📄 db-creds.yaml
│ ├── 📄 lldap-creds.yaml
│ ├── 📄 ns.yaml
│ ├── 📄 smtp-creds.yaml
│ ├── 📄 valkey-creds.yaml
│ └── 📝 values.yaml
└── 📂 scripts
├── 📖 README.md
├── 📃 implicit_flow.sh
├── 📃 fetch_tokens.sh
├── 📃 inspect_tokens.sh
├── 📃 refresh_token.sh
└── 📃 verify_id_token.shBasic#
# basic/kustomization.yaml
apiVersion: kustomize.config.k8s.io/v1beta1
kind: Kustomization
helmCharts:
- name: authelia
repo: https://charts.authelia.com
releaseName: authelia
namespace: authelia
version: 0.10.50
valuesFile: minimal-values.yaml# basic/minimal-values.yaml
configMap:
session:
cookies: [ { domain: 127.0.0.1 } ]
storage:
local: { enabled: true }
notifier:
filesystem: { enabled: true }
authentication_backend:
file: { enabled: true }Simple#
# simple/kustomization.yaml
apiVersion: kustomize.config.k8s.io/v1beta1
kind: Kustomization
resources:
- ns.yaml
- crypto.yaml
- jwk-rsa.yaml
- users.yaml
helmCharts:
- name: authelia
repo: https://charts.authelia.com
releaseName: authelia
namespace: authelia
version: 0.10.50
valuesFile: values.yaml# simple/ns.yaml
apiVersion: v1
kind: Namespace
metadata:
name: authelia# simple/crypto.yaml
apiVersion: v1
kind: Secret
metadata:
name: crypto
namespace: authelia
stringData:
identity_providers.oidc.hmac.key: '<OIDC_HMAC_KEY>'
identity_validation.reset_password.jwt.hmac.key: '<RESET_ENCRYPTION_KEY>'
session.encryption.key: '<SESSION_ENCRYPTION_KEY>'
storage.encryption.key: '<STORAGE_ENCRYPTION_KEY>'# simple/jwk-rsa.yaml
apiVersion: v1
kind: Secret
metadata:
name: jwk-rsa
namespace: authelia
stringData:
private.pem: |
-----BEGIN PRIVATE KEY-----
MIIEvwIBADANBgkqhkiG9w0BAQEFAASCBKkwggSlAgEAAoIBAQDmQR5KGGOqscBK
ZmgBfGMqFl3UJ+JzeA8yvlkYYC/gOuIiDkHIE8MjzHd21Df7zRRGEr+Mw7WZ73Cu
JBofb3D+pOKEYE9oM35KyGfC9wZfHmz/ToY6geNRgPpdAvblwLAq4yKHLfJoc2Ji
S3dtkSL9Ub8zx8eBi+GIEI2MdK35ZDB2nfszVaIX5Xn+IFa7mUK3tbr9CfryrCyM
OlKLwoGPrGtXc9jKSVbHItAQ4Bip4yqvEF0bq1rK6OC0DfGaKqKHZntjLUtEJ934
yRasa++8dGxnV4Ewv0wLnR8kN+rDUPk65gY2Ottn8WC9RA8pRSVm/BMNBmLsdm1v
hmpLaFBpAgMBAAECggEBANoeh9YDIq85sYIJXq9BqSLei0YF/nQKIMOeJAJ+Y/wT
a9J9FP23Et2fvO+5e8sx6+mxqvlrEGZht6mPk5uB01W21so1/iMk3Jd1Hy5HGicT
SIfWWDumfbPg7cscmszs6zXFcxkBgqhF3cZl3R3TJoU4Yltn/muPGjfuDlkm0wPy
hBNG5erNSUDuz6wwfupJ9Ln/cxDPRpMITemkrKRK83C/deyHnoKCCwPe0Bh5kYK4
j/dcrSFdHokrxf/Jo46v67Nb6TsuZ9ZLmo1Gc7OfYeBTw4W8rDgeY2rwUK26fTE5
6nQZqEGpHNQqGx9NtD3FDVCFug14qpZIuzwJDRiu4H0CgYEA9xZwzWcANFNWe+d9
ZB/3CVPw29rWwF28sw8FfaU/I8eg6kST1VaI5IFxsq7tQKF33dUwT2pu1E5uiqSn
f+wzXyEYaU9XGmZ2Nu5V9ZEeXBUlO6Dvposaa5Pa2spWjdztWA1uyhlo4mkE+RVA
RZBXAF7rQ9nvkT0FK8RwrIlJFRcCgYEA7o8+CxNIMjo+SvvSFDlEkRjV+cZIEDg8
Otc9p5/ZpuR9ROUuIAC5XkcWGHl1SHJmvrjgT601+kTmYCgE30Gks2KDT5uv8frD
TUB4yn8APxolga4t4szSumLFcqMol79uBrs8W5tNpJti4nT5hIfdrulAH9JYLj3r
uhA94yBsNn8CgYEA6FqM90s98PbRpDDbRJWenIH4RPc07a74bTXaBv6nMoFevA6D
KqJ2ltN3VP2UlCuDafM5u+Stli6vWuddsDkxUerwZs+6bFQgJKXZ5dRyxUsJOVqt
ImM7FCD1NLwDyuIPu7beEWT1sbvqdkVarFAA0JNyD9tYoq7MNw1Cm616MT8CgYEA
ywdd5k8iwpyPJ4Hp6QxULqjUcx8tdaBmoi1Na7u/oSoU8u2Zs+Lp4DLfuzSjfGTg
zLDLNwRTTAwXhP6KJvfXFFRjLP1zYJ3qWXTlWHF95DZ8dUGoC74GGlq1cDsr8Poa
yd/QHqauDcmw/spPEVwQbyxURsDeC3znghMQmJyffEECgYA+uwn8w7hL77O9R+pL
DbC6com6faFE2a1rk8Bj/SlWK6fjrjyFhnEmH7b00t9PAwN7GaQhOI28T8OsrXuH
SSwuAbhGPiSUgURmCz3jkyJ5sP7RYhSSqCxi/UsczrNlpUmDnlSgLgVQMS+idnis
fK9k70Cc6TdDIV0daBi5Cgf6tA==
-----END PRIVATE KEY-----# simple/users.yaml
apiVersion: v1
kind: Secret
metadata:
name: users
namespace: authelia
stringData:
users.yaml: |
users:
alice:
displayname: Alice Mizuki
password: $argon2id$v=19$m=65536,t=3,p=4$Hqe49sm+sI2kXpIR72MQ1A$7G+g37YcU7zFM8gaF+rGNBgKi6JRDBjfByuPywzv8JU
email: [email protected]
groups: [ user ]
lain:
displayname: Lain Iwakura
password: $argon2id$v=19$m=65536,t=3,p=4$NqJWdx5T3fiBkQ3Y2xxPcQ$tTbRWahhnfDVuc5ZiSSMb+UARwidpK6tc4MyiPYSLgg
email: [email protected]
groups: [ admin, dev ] | |
Advanced#
# advanced/kustomization.yaml
apiVersion: kustomize.config.k8s.io/v1beta1
kind: Kustomization
resources:
- ns.yaml
- crypto.yaml
- cert-jwk-rsa.yaml
- cert-jwk-ecdsa.yaml
- db-creds.yaml
- lldap-creds.yaml
- smtp-creds.yaml
- valkey-creds.yaml
helmCharts:
- name: authelia
repo: https://charts.authelia.com
releaseName: authelia
namespace: authelia
version: 0.10.50
valuesFile: values.yaml
  - name: valkey
    repo: https://valkey.io/valkey-helm/
    releaseName: valkey
    namespace: authelia
    version: 0.9.3
    valuesInline:
      dataStorage: { enabled: false }
      tls: { enabled: false }
      auth:
        enabled: true
        usersExistingSecret: valkey-credentials
        aclUsers:
          default:
            permissions: "off ~* &* -@all"
            passwordKey: defaultUserPassword
          authelia:
            permissions: "~* &* +@all"
passwordKey: autheliaUserPassword# advanced/ns.yaml
apiVersion: v1
kind: Namespace
metadata:
name: authelia# advanced/crypto.yaml
apiVersion: v1
kind: Secret
metadata:
name: crypto
namespace: authelia
stringData:
identity_providers.oidc.hmac.key: '<OIDC_HMAC_KEY>'
identity_validation.reset_password.jwt.hmac.key: '<RESET_ENCRYPTION_KEY>'
session.encryption.key: '<SESSION_ENCRYPTION_KEY>'
storage.encryption.key: '<STORAGE_ENCRYPTION_KEY>'# advanced/db-creds.yaml
apiVersion: v1
kind: Secret
metadata:
name: db-creds
namespace: authelia
stringData:
postgres-password: '<POSTGRES_USER_PASSWORD>'
username: 'authelia'
password: '<AUTHELIA_USER_PASSWORD>'
database: 'authelia'# advanced/lldap-creds.yaml
apiVersion: v1
kind: Secret
metadata:
name: lldap-auth
namespace: authelia
stringData:
password: "<AUTHELIA_LLDAP_USER_PASSWORD>"# advanced/smtp-creds.yaml
apiVersion: v1
kind: Secret
metadata:
name: smtp-creds
namespace: authelia
stringData:
username: "<SMTP_RELAY_USERNAME>"
password: "<SMTP_RELAY_PASSWORD>"# kubeseal -o yaml --controller-namespace=sealed-secrets < secret-authelia-valkey.yaml > k8s/infra/auth/authelia/valkey-credentials.yaml
apiVersion: v1
kind: Secret
metadata:
name: valkey-credentials
namespace: authelia
stringData:
autheliaUserPassword: "<AUTHELIA_USER_PASSWORD>"
defaultUserPassword: "<DEFAULT_USER_PASSWORD>"# advanced/cert-rsa-jwk.yaml
apiVersion: cert-manager.io/v1
kind: Certificate
metadata:
name: jwk-rsa
namespace: authelia
spec:
dnsNames: [ authelia.example.com ]
issuerRef:
group: cert-manager.io
kind: ClusterIssuer
name: cluster-issuer
privateKey:
algorithm: RSA
encoding: PKCS8
size: 2048
secretName: jwk-rsa
usages:
- digital signature
- key encipherment# advanced/cert-ecdsa-jwk.yaml
apiVersion: cert-manager.io/v1
kind: Certificate
metadata:
name: jwk-ecdsa
namespace: authelia
spec:
dnsNames: [ authelia.example.com ]
issuerRef:
group: cert-manager.io
kind: ClusterIssuer
name: cluster-issuer
privateKey:
algorithm: ECDSA
encoding: PKCS8
size: 256
secretName: jwk-ecdsa
usages:
- digital signature
- key encipherment | |
Scripts#
Script for running Implicit Flow authentication
#!/bin/bash
# scripts/implicit_flow.sh

# Configuration
client_id="public_client"
base_url="http://127.0.0.1:9091"
redirect_uri="http://localhost:8080/callback"
scopes="openid profile groups"
claims='{"id_token":{"email":{"essential":true},"name":{},"preferred_username":{},"groups":{}}}'

# URL encode scopes
url_encoded_scopes=$(jq -nr --arg str "$scopes" '$str|@uri')

# URL encode claims
url_encoded_claims=$(jq -nr --arg str "$claims" '$str|@uri')

# Fetch OpenID endpoints
openid_config=$(curl -s "$base_url/.well-known/openid-configuration")
auth_endpoint=$(echo "$openid_config" | jq -r '.authorization_endpoint')

# Create the authorization URL
auth_url="${auth_endpoint}"
auth_url+="?response_type=id_token"
auth_url+="&client_id=${client_id}"
auth_url+="&redirect_uri=${redirect_uri}"
auth_url+="&scope=${url_encoded_scopes}"
auth_url+="&claims=${url_encoded_claims}"
auth_url+="&state=$(openssl rand -hex 16)"
auth_url+="&nonce=$(openssl rand -hex 16)"

echo "Open the following URL in your browser and authenticate:"
echo -e "\033[1m$auth_url\033[0m\n"

echo -e "Paste full response URL (will show 'unable to connect' page):"
read -r auth_response

# Extract ID token from response
id_token=${auth_response#*id_token=}
id_token=${id_token%%&*}

echo -e "\nID token (paste into https://jwt.io for more details):"
echo -e "\033[1m$id_token\033[0m"
Scripts for running Authorization Code Flow authentication with PKCE
#!/bin/bash
# scripts/fetch_tokens.sh

# Configuration
client_id="confidential_client"
client_secret="SxRKHqOmrgrZEE~xF.USJDvIdCCh1q9baBynaKlt3AeWj.WxItcXS1CBOE5i58vMXjw.Qkzl"
base_url="http://127.0.0.1:9091"
redirect_uri="http://localhost:8080/callback"
scopes="openid profile offline_access groups"
claims='{"id_token":{"email":{"essential":true},"name":{},"preferred_username":{},"groups":{}}}'

function base64_to_base64url() {
    local input
    [[ -n "$1" ]] && input="$1" || input=$(cat)
    echo -n "$input" | tr '+/' '-_' | tr -d '='
}

function base64url_to_base64() {
    local input
    [[ -n "$1" ]] && input="$1" || input=$(cat)
    echo -n "$input" | tr -- '-_' '+/' | awk '{ while(length($0) % 4 != 0) $0=$0"="; print }'
}

# URL encode scopes
url_encoded_scopes=$(jq -nr --arg str "$scopes" '$str|@uri')

# URL encode claims
url_encoded_claims=$(jq -nr --arg str "$claims" '$str|@uri')

# Fetch OpenID endpoints
openid_config=$(curl -s "$base_url/.well-known/openid-configuration")
auth_endpoint=$(echo "$openid_config" | jq -r '.authorization_endpoint')
token_endpoint=$(echo "$openid_config" | jq -r '.token_endpoint')
userinfo_endpoint=$(echo "$openid_config" | jq -r '.userinfo_endpoint')
introspection_endpoint=$(echo "$openid_config" | jq -r '.introspection_endpoint')
revocation_endpoint=$(echo "$openid_config" | jq -r '.revocation_endpoint')
jwks_uri=$(echo "$openid_config" | jq -r '.jwks_uri')

# Generate PKCE code verifier and challenge
code_verifier=$(openssl rand -base64 96 | tr -d '\n' | base64_to_base64url "$@" | cut -c 1-128)
code_challenge=$(echo -n "$code_verifier" | openssl dgst -sha256 -binary | base64 | base64_to_base64url)

# Generate state parameter to mitigate CSRF-attacks
state=$(openssl rand -hex 16)

# Create the authorization URL
auth_url="${auth_endpoint}"
auth_url+="?response_type=code"
auth_url+="&client_id=${client_id}"
auth_url+="&redirect_uri=${redirect_uri}"
auth_url+="&scope=${url_encoded_scopes}"
auth_url+="&claims=${url_encoded_claims}"
auth_url+="&code_challenge_method=S256"
auth_url+="&code_challenge=${code_challenge}"
auth_url+="&state=${state}"

echo "Open the following URL in your browser and authenticate:"
echo -e "\033[1m$auth_url\033[0m\n"

echo -e "Paste full response URL (will show 'unable to connect' page):"
read -r auth_response

# Check state parameter to mitigate CSRF attack
received_state=${auth_response#*state=}
received_state=${received_state%%&*}

echo -en "\nChecking state matches for CSRF attack mitigation... "
[[ "$received_state" == "$state" ]] && echo -e "\033[1mmatch\033[0m" || echo -e "\033[1mno match!\033[0m"

# Extract the authorization code
auth_code=${auth_response#*code=}
auth_code=${auth_code%%&*}

echo -e "\nAuthorization code: \n\033[1m$auth_code\033[0m"

# Exchange the authorization code for tokens
echo -en "\nExchanging authorization code for tokens... "
token_response=$(curl -s -X POST "$token_endpoint" \
  -H "Content-Type: application/x-www-form-urlencoded" \
  -H "Authorization: Basic $(echo -n "${client_id}:${client_secret}" | base64)" \
  -d "grant_type=authorization_code" \
  -d "code_verifier=${code_verifier}" \
  -d "code=${auth_code}" \
  -d "redirect_uri=${redirect_uri}" \
  -w "\n%{http_code}")

token_response_status_code=$(echo "$token_response" | tail -n1)
[[ "$token_response_status_code" -eq 200 ]] && echo -e "\033[1msuccessful\033[0m" || echo -e "\033[1mfailed\033[0m"

token_response_body=$(echo "$token_response" | sed '$d')

# Extract tokens from token response
access_token=$(echo "$token_response_body" | jq -r '.access_token')
refresh_token=$(echo "$token_response_body" | jq -r '.refresh_token')
id_token=$(echo "$token_response_body" | jq -r '.id_token')

id_token_header=$(echo "$id_token" | cut -d '.' -f1)
id_token_payload=$(echo "$id_token" | cut -d '.' -f2)
id_token_signature=$(echo "$id_token" | cut -d '.' -f3)

id_token_header_decoded=$(echo "$id_token_header" | base64url_to_base64 "$@"| base64 -d 2>/dev/null)
id_token_payload_decoded=$(echo "$id_token_payload" | base64url_to_base64 "$@" | base64 -d 2>/dev/null)
#!/bin/bash
# scripts/inspect_tokens.sh
source ./fetch_tokens.sh
echo -e "\nReply from token endpoint:"
echo "$token_response" | jq .
echo -e "\nAccess token:"
echo -e "\033[1m$access_token\033[0m"
echo -e "\nRefresh token:"
echo -e "\033[1m$refresh_token\033[0m"
echo -e "\nID token (paste into https://jwt.io for more details):"
echo -e "\033[1m$id_token\033[0m"
echo -e "\nDecoded ID token header:"
echo "$id_token_header_decoded" | jq .
echo "Decoded ID token payload:"
echo "$id_token_payload_decoded" | jq .
echo "ID token signature:"
echo "$id_token_signature"
echo -e "\nIntrospecting access token..."
access_token_introspection_response=$(curl -s -X POST "$introspection_endpoint" \
-H "Content-Type: application/x-www-form-urlencoded" \
-H "Authorization: Basic $(echo -n "${client_id}:${client_secret}" | base64)" \
-d "token=${access_token}")
echo "$access_token_introspection_response" | jq .
echo -e "\nIntrospecting refresh token..."
refresh_token_introspection_response=$(curl -s -X POST "$introspection_endpoint" \
-H "Content-Type: application/x-www-form-urlencoded" \
-H "Authorization: Basic $(echo -n "${client_id}:${client_secret}" | base64)" \
-d "token=${refresh_token}")
echo "$refresh_token_introspection_response" | jq .
# Fetch data from userinfo endpoint
echo -e "\nCalling userinfo endpoint using access token..."
userinfo_response=$(curl -s "$userinfo_endpoint" -H "Authorization: Bearer ${access_token}")
echo "$userinfo_response" | jq .#!/bin/bash
# scripts/refresh_token.sh
source ./fetch_tokens.sh
# Test refresh token
echo -en "\nRefreshing tokens... "
refresh_response=$(curl -s -X POST "$token_endpoint" \
-H "Content-Type: application/x-www-form-urlencoded" \
-H "Authorization: Basic $(echo -n "${client_id}:${client_secret}" | base64)" \
-d "grant_type=refresh_token" \
-d "refresh_token=${refresh_token}" \
-w "\n%{http_code}")
refresh_status_code=$(echo "$refresh_response" | tail -n1)
refresh_response_body=$(echo "$refresh_response" | sed '$d')
[[ "$refresh_status_code" -eq 200 ]] && echo -e "\033[1msuccessful\033[0m" || echo -e "\033[1mfailed\033[0m"
new_access_token=$(echo "$refresh_response_body" | jq -r '.access_token')
new_refresh_token=$(echo "$refresh_response_body" | jq -r '.refresh_token')
old_access_token_status=$(curl -si "$userinfo_endpoint" \
-H "Authorization: Bearer ${access_token}" | head -n1)
echo -e "Old access code (should give 401): \033[1m$old_access_token_status\033[0m"
new_access_token_status=$(curl -si "$userinfo_endpoint" \
-H "Authorization: Bearer ${new_access_token}" | head -n1)
echo -e "New access code (should give 200): \033[1m$new_access_token_status\033[0m"
# Revoke new access token
echo -en "\nRevoking new access_token... "
revocation_status_code=$(curl -s -X POST "$revocation_endpoint" \
-H "Content-Type: application/x-www-form-urlencoded" \
-H "Authorization: Basic $(echo -n "${client_id}:${client_secret}" | base64)" \
-d "token=${new_access_token}" \
-w "%{http_code}")
[[ "$revocation_status_code" -eq 200 ]] && echo -e "\033[1msuccessful\033[0m" || echo -e "\033[1mfailed\033[0m"
new_access_token_status=$(curl -si "$userinfo_endpoint" \
-H "Authorization: Bearer ${new_access_token}" | head -n1)
new_refresh_response_status=$(curl -si -X POST "$token_endpoint" \
-H "Content-Type: application/x-www-form-urlencoded" \
-H "Authorization: Basic $(echo -n "${client_id}:${client_secret}" | base64)" \
-d "grant_type=refresh_token" \
-d "refresh_token=${new_refresh_token}" | head -n1)
echo -e "New access code (should give 401): \033[1m$new_access_token_status\033[0m"
echo -e "New refresh token (should give 400): \033[1m$new_refresh_response_status\033[0m"#!/bin/bash
# scripts/verify_id_token.sh
source ./fetch_tokens.sh
# Check that the token issuer is one we trust
echo -en "\nChecking issuer matches trusted source... "
issuer=$(echo "$id_token_payload_decoded" | jq -r '.iss')
[[ "$issuer" == "$base_url" ]] && echo -e "\033[1mmatch\033[0m" || echo -e "\033[1mno match!\033[0m"
# Check that audience contains the client ID, it may contain multiple (not checked for)
audience=$(echo "$id_token_payload_decoded" | jq -r '.aud.[0]')
echo -en "\nChecking audience matches client ID... "
[[ "$audience" == "$client_id" ]] && echo -e "\033[1mmatch\033[0m" || echo -e "\033[1mno match!\033[0m"
# Check that the token has not expired
unix_now=$(date +%s)
echo -en "\nChecking that token has not expired... "
expires=$(echo "$id_token_payload_decoded" | jq -r '.exp')
[[ $expires -gt $unix_now ]] && echo -e "\033[1mvalid\033[0m" || echo -e "\033[1mexpired!\033[0m"
# Check that the token has not expired
echo -en "\nChecking that token is not issued in the future... "
issued=$(echo "$id_token_payload_decoded" | jq -r '.iat')
[[ $issued -le $unix_now ]] && echo -e "\033[1mvalid\033[0m" || echo -e "\033[1mexpired!\033[0m"
# Verify ID token signature
echo -e "\nVerifying ID token signature..."
key_id=$(echo "$id_token_header_decoded" | jq -r '.kid')
echo -e "ID token key id: \033[1m$key_id\033[0m"
# Fetch JWKs
echo -e "Fetching \033[1m$key_id\033[0m JSON Web Key..."
jwks_response=$(curl -s "$jwks_uri")
jwk=$(echo "$jwks_response" | jq -r --arg key_id "$key_id" '.keys[] | select(.kid == $key_id)')
echo "$jwk" | jq .
jwk_n=$(echo "$jwk" | jq -r '.n' )
jwk_e=$(echo "$jwk" | jq -r '.e' )
echo -en "Generating ASN.1 representation of public RSA key... "
asn1_conf=$(cat << EOF
asn1=SEQUENCE:pubkeyinfo
[pubkeyinfo]
algorithm=SEQUENCE:rsa_alg
pubkey=BITWRAP,SEQUENCE:rsapubkey
[rsa_alg]
algorithm=OID:rsaEncryption
parameter=NULL
[rsapubkey]
n=INTEGER:0x$(base64url_to_base64 "$jwk_n" | base64 -d | xxd -p | tr -d '\n')
e=INTEGER:0x$(base64url_to_base64 "$jwk_e" | base64 -d | xxd -p | tr -d '\n')
EOF
)
echo -e "\033[1mok\033[0m"
tmp_dir=$(mktemp -d)
echo -n "Encode ASN.1 formatted public RSA key to binary DER format... "
openssl asn1parse -noout -genconf <(echo "$asn1_conf") -out >(cat > "$tmp_dir/public.der") 2>/dev/null
echo -e "\033[1mok\033[0m"
echo -en "Verifying signature using DER formatted key... \033[1m"
echo -n "${id_token_header}.${id_token_payload}" |
openssl dgst -sha256 -verify "$tmp_dir/public.der" -signature <(echo "$id_token_signature" | base64url_to_base64 "$@" | base64 -d)
echo -en "\033[0m"
# Clean up temporary files we still had to create
rm -f "$tmp_dir/public.der"bonus points for figuring out
lain’s password. ↩︎